Magento 2 is a flexible and powerful platform for eCommerce development. In this tutorial, we’ll guide you through the process of creating a basic Magento 2 module named “Hello World”. Instead of simply outputting text in the controller, we’ll properly use layout XML and PHTML files to display the message on the frontend.
Main Components of a Magento 2 Module
Before diving into the code, let’s break down the main components you’ll be working with in Magento 2:
- Module Declaration (
etc/module.xml) - Registration (
etc/registration.php) - Controller (Responsible for handling requests)
- Layout XML (Defines which blocks and templates are loaded for a page)
- PHTML File (Used to display frontend content)
Step 1: Create the Folder Structure
Start by creating the necessary folders. Magento 2 follows a strict folder structure, and every module must be located under app/code/{Vendor}/{ModuleName}.
- Go to the Magento root directory.
- Create the following directories:
app/code/VendorName/HelloWorldReplace VendorName with your unique namespace (usually your company or project name), and HelloWorld is the name of the module.
Inside the HelloWorld folder, create the following subdirectories:
app/code/VendorName/HelloWorld/
├── registration.php
├── etc/
│   ├── module.xml
├── Controller/
│   ├── Index/
│   │   └── Index.php
├── view/
│   ├── frontend/
│   │   ├── layout/
│   │   │   └── helloworld_index_index.xml
│   │   ├── templates/
│   │   │   └── hello.phtml
Step 2: Create the etc/module.xml File
The module.xml file declares your module to Magento. In this file, you’ll specify your module’s name and version.
Create the module.xml file in the etc directory:
<?xml version="1.0"?>
<config xmlns:xsi="http://www.w3.org/2001/XMLSchema-instance"
        xsi:noNamespaceSchemaLocation="urn:magento:framework:Module/etc/module.xsd">
    <module name="VendorName_HelloWorld"/>
</config>
Step 3: Create the registration.php File
The registration.php file tells Magento where to find your module.
- Create the
registration.phpfile in theHelloWorldfolder:
<?php

use Magento\Framework\Component\ComponentRegistrar;

ComponentRegistrar::register(
    ComponentRegistrar::MODULE,
    'VendorName_HelloWorld',
    __DIR__
);
Step 4: Enable the Module
After creating the basic files, enable the module:
- Open the terminal in the Magento root directory.
- Run the following commands:
php bin/magento module:enable VendorName_HelloWorld
php bin/magento setup:upgrade
php bin/magento cache:clean
This will register and enable your module.
Step 5: Create Controller
Now let’s create a controller that will render a layout and call a PHTML template file.
Create the Index.php file inside the Controller/Index directory:
<?php

declare(strict_types=1);

namespace VendorName\HelloWorld\Controller\Index;

use Magento\Framework\App\Action\HttpGetActionInterface;
use Magento\Framework\Controller\ResultInterface;
use Magento\Framework\View\Result\PageFactory;

class Index implements HttpGetActionInterface
{
    /**
     * @param PageFactory $resultPageFactory
     */
    public function __construct(
        private readonly PageFactory $resultPageFactory
    ) {
    }

    /**
     * Execute view action
     *
     * @return ResultInterface
     */
    public function execute(): ResultInterface
    {
        return $this->resultPageFactory->create();
    }
}
This controller returns a result page object which will render the layout and the corresponding template.
Step 6: Define a Route
Now, define a route to access the controller.
Create a routes.xml file in the etc/frontend directory:
<?xml version="1.0"?>
<config xmlns:xsi="http://www.w3.org/2001/XMLSchema-instance"
        xsi:noNamespaceSchemaLocation="urn:magento:framework:App/etc/routes.xsd">
    <router id="standard">
        <route id="helloworld" frontName="helloworld">
            <module name="VendorName_HelloWorld"/>
        </route>
    </router>
</config>
This will define a route with the front name helloworld. Now, when visiting:
http://your-magento-site/helloworld/index/indexIt will call the Index controller’s execute() method.
Step 7: Create a Layout XML File
Next, you need to define a layout XML file to tell Magento which template to use for the helloworld_index_index route.
Create a layout file named helloworld_index_index.xml in the view/frontend/layout directory:
<?xml version="1.0"?>
<page xmlns:xsi="http://www.w3.org/2001/XMLSchema-instance"
      xsi:noNamespaceSchemaLocation="urn:magento:framework:View/Layout/etc/page_configuration.xsd">
    <body>
        <referenceContainer name="content">
            <block class="Magento\Framework\View\Element\Template" name="helloworld"
                   template="VendorName_HelloWorld::hello.phtml"/>
        </referenceContainer>
    </body>
</page>
This layout file specifies that the helloworld.phtml file will be loaded inside the content block.
Step 8: Create the PHTML Template
Finally, create the template file that will display the “Hello World!” message.
Create a helloworld.phtml file inside the view/frontend/templates directory:
<h1>Hello World!</h1>This is the content that will be displayed when the page is accessed.
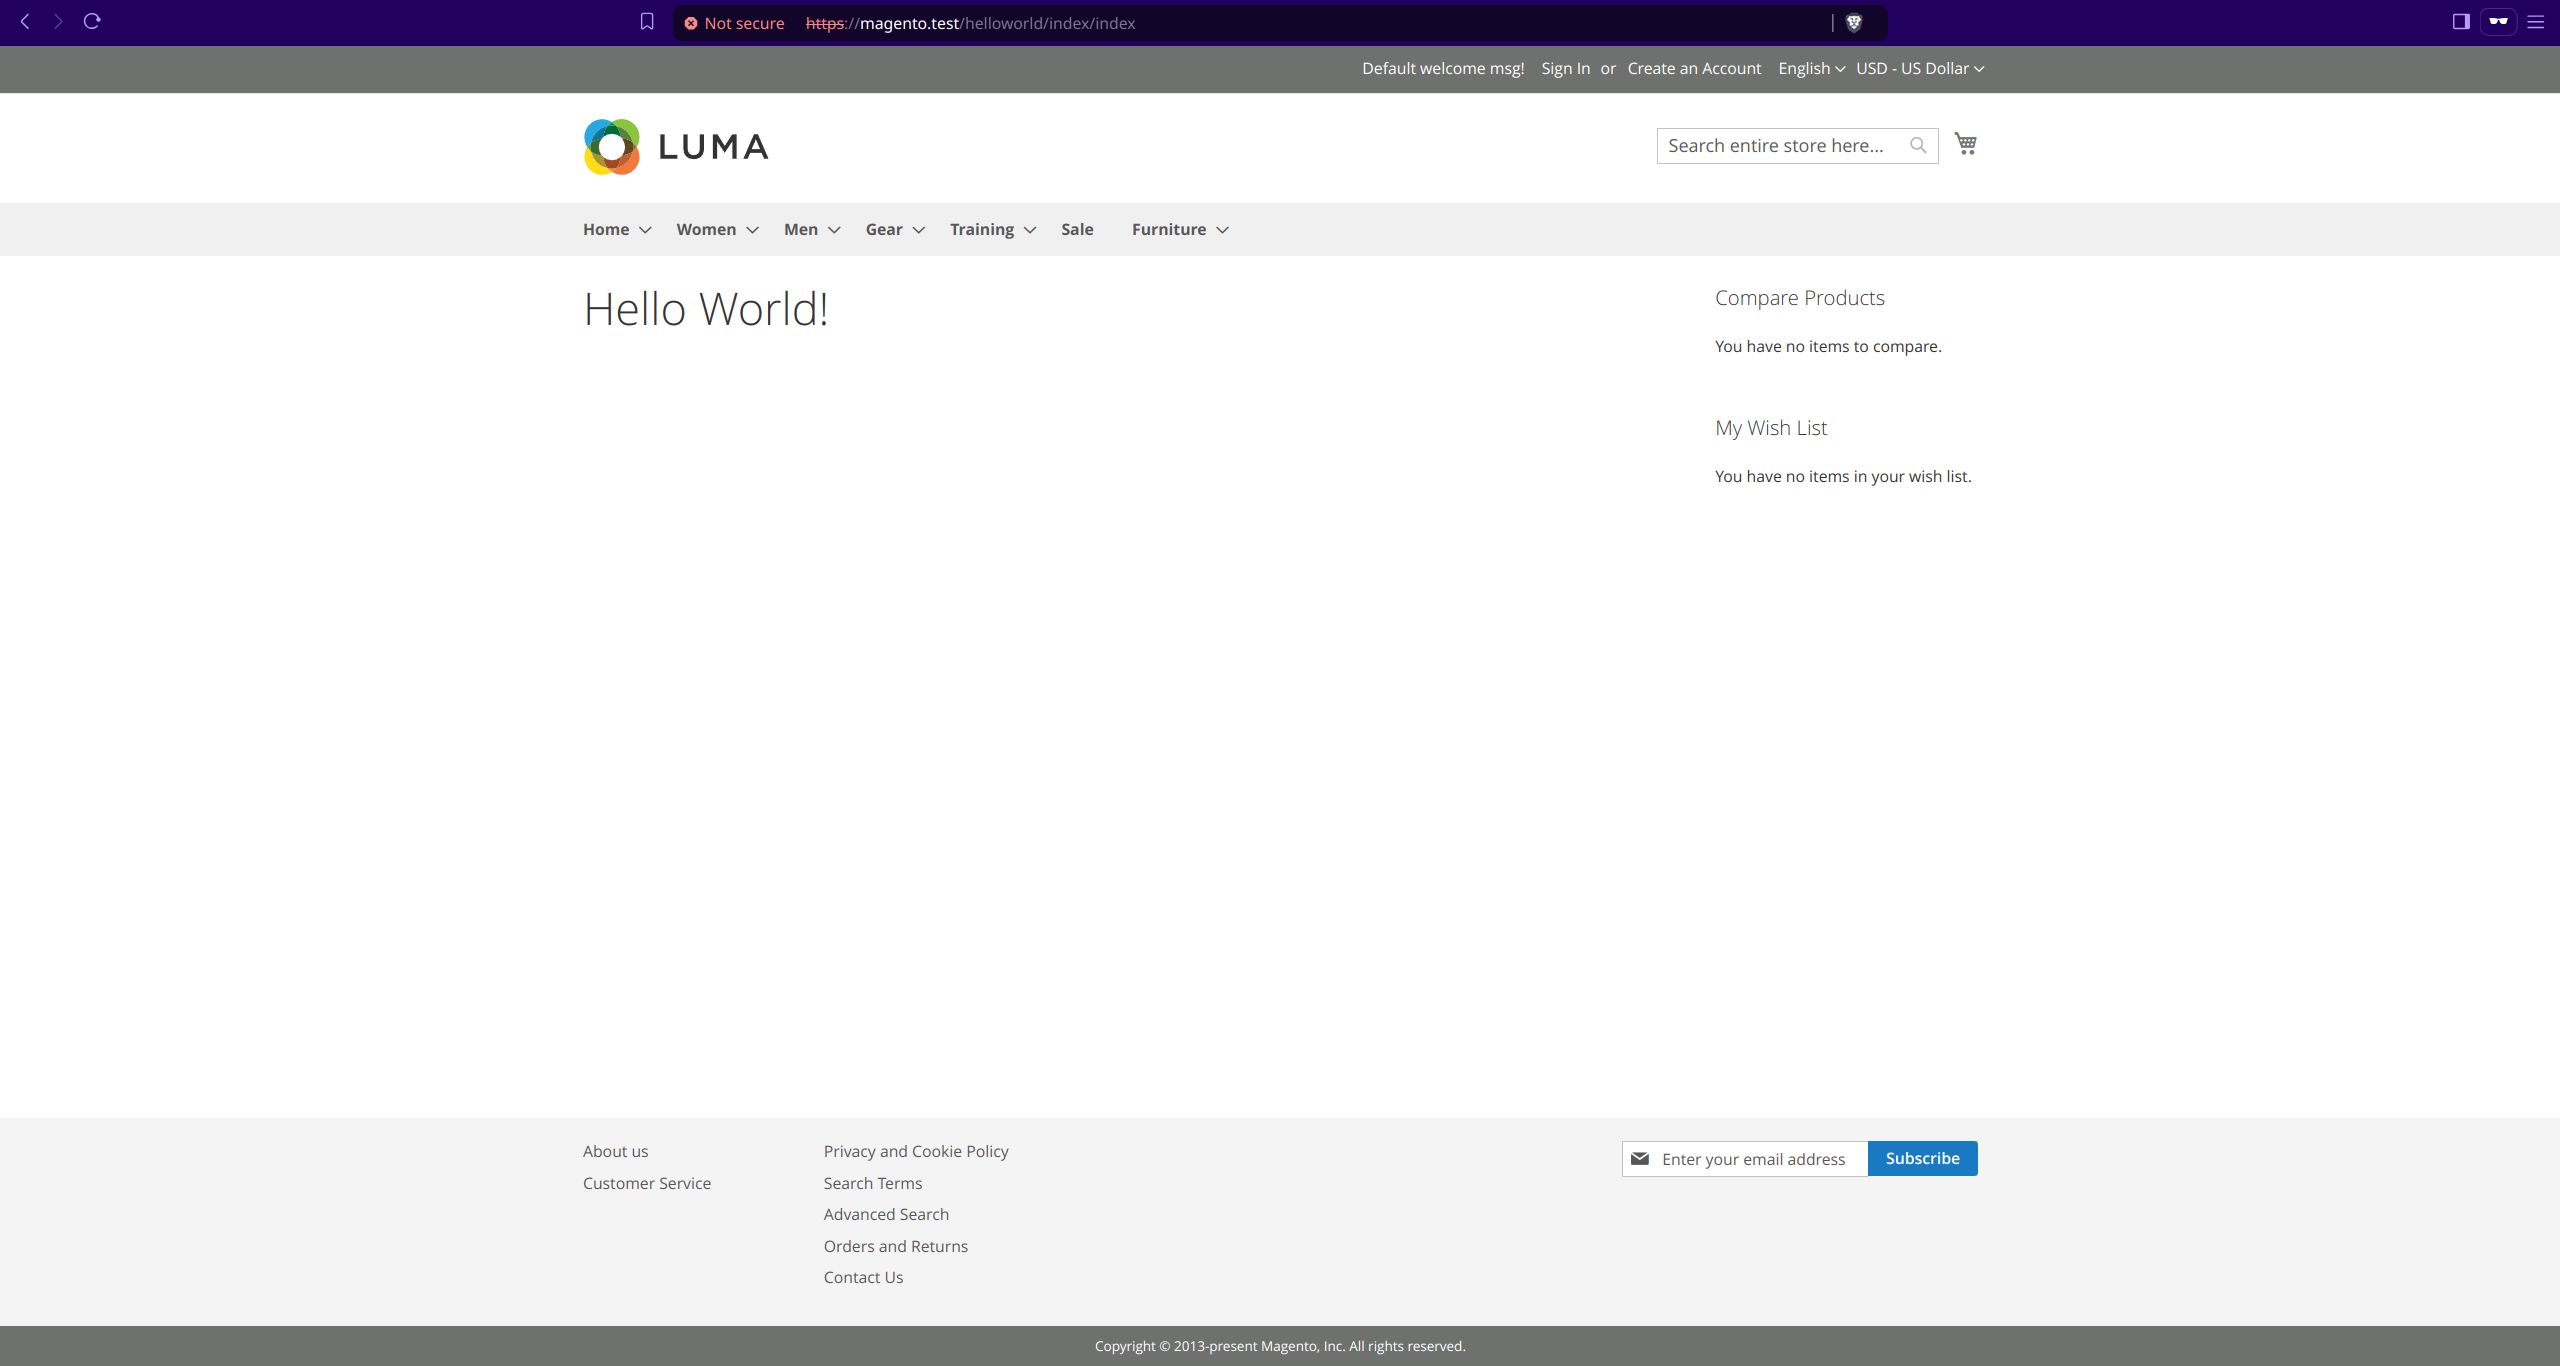
Step 9: Test Your Module
To test your Hello World module:
- Open your browser.
- Go to the following URL:
http://your-magento-site/helloworld/index/indexIf everything is configured correctly, you should see the message “Hello World!” displayed on the page.
Conclusion
Congratulations! You’ve successfully created a Magento 2 “Hello World” module using proper layout XML and PHTML files. Instead of outputting directly from the controller, you learned how to separate logic and presentation, a key principle in Magento 2 development.
This foundational example can be expanded to include dynamic data, custom blocks, and more complex functionality. Keep exploring, and you’ll soon master Magento 2 module development.
Module Structure Files
etc/module.xml: This file declares your module to Magento, specifying its name, setup version, and dependencies. It’s essential for Magento to recognize and load your module correctly.etc/registration.php: This script registers your module with the Magento framework. It tells Magento to include your module in its dependency injection system.- Controller: The controller handles incoming requests, processes them, and returns a response. It separates the logic of handling requests from the presentation layer, adhering to MVC architecture.
- Layout XML files: These files define how your module’s UI components will be rendered in the Magento frontend. They specify the structure and layout of pages.
- PHTML files: These are template files where you write your HTML and PHP code to display content. They separate the presentation from the logic, allowing for cleaner and more maintainable code.